
This week is the final week our 12-week series on using everyday objects for language. On Week 12 we will focus on all things bedroom. We will have 4-5 activities and crafts to complete throughout the week. My goal is to keep it simple and use only items you likely already have or can substitute easily. Want to take a peek at what we’re doing?
Get the Packet

In this packet you will find:
- 8 Crafts/ Activities with 3 visual directions that make it easy for your child to follow along (and help retell after!) and 3 worksheets to get you started
- 5 worksheets for additional practice/creativity
- Social Narrative: Getting Ready for Bed
- Visual Checklist for Bedtime
- Core & Fringe Word Lists for Bedroom
Schedule
Monday: Bedroom Sensory Bin
Tuesday: Abstract Initial Art
Wednesday: DIY Night Light (Easy Version & Harder Version)
Thursday: Fabric Hunt (Toddler Version & Older Version)
Friday: DIY Dream Catcher
Bedroom Sensory Bin

Possible Materials:
- Filler:
- Cotton Balls
- Feathers
- Rolled Up Sheet
- Items to put in:
- Dollhouse Bedroom Items
- Clothes
- Diapering Station Items
- Fabric Swatches
How to Use for Language:
- If you are new to the world of sensory bins and your child is young- I strongly encourage you to read How to Introduce Sensory Bins to Your Toddler before getting started.
- Requesting: Put the sensory bin just out of reach but in line of your child. Have them request (pointing, “want”/”(item name)”, “I want”, “I want ______ please”) based on their level of communication. Then add 1 word to it (this is called language expansion). Periodically as they play do this over and over- putting the lid on, holding onto the tool so they have to request, moving just out of reach, etc.
- Labeling Vocabulary: As the child finds the different objects (typically theme related- here it is bedroom/dressing) have them name the item. If they don’t say the name, label it and have them try to imitate.
- Expanding Words to Phrases/Phrases to Sentences: Once your child knows the vocabulary you can expand to a phrase (or phrase to sentences). Use a repetitive sentence (it can be different every time you use this sensory bin) to practice making phrases/sentences. Some possibilities:
- “Found diaper”/ “I found a diaper”
- “Got brush”/ “I got a brush”
- “See brush”/ “I see a brush”
- “It pillow”/ “It is a pillow!”
- Identifying Vocabulary & Following Directions:
- Level 1 (1 year olds): “Find the ______” (naming the item). See if the child can find it then have them name it.
- Level 2 (2 year olds +): “Find something that has is soft and rectangular. You put your head on it in bed.” Give details as clues for the child to make the inference and find the described object. Don’t want to come up with this on your own? Grab my pre-made clues in the packet HERE!
- Level 3 (2-3 year olds +): Have them put the items in the sensory bin. “Put the diaper under the brush”. “Put the brush next to/beside the pillow”. If you want to work on prepositions with your 1 year old, start with “put in, take out”.
- Describing: As your child picks up each item have them describe it by talking about what it looks and feels like. If this is easy for them have them tell your more about what they know about each items (parts, category, what it does, sounds it may make, where you find it, etc.). If your child is still at the labeling stage you can model this every time they name an item found so they are hearing this language skill in action.
Abstract Initial Art


Materials Needed:
- Marbles/Balls
- Posterboard/Cardstock
- Scissors
- Box/tub
- Paint
- Visual Directions
Directions:
- Precut the Initial out of cardstock/posterboard.
- Gather all materials. Let your child help you with this. Name the areas of your house you find each one in “Get the paint from the art drawer. Now let’s get the marbles out of the living room”. Set all up on the (protected) table (“put it on the table”). Go ahead and choose the colors of paint to be used- make sure they are requesting!
- Read the visual directions all the way through out loud, pointing to each picture. If your child is using sentences point to each picture afterwards and have them tell you again what is going to happen (to practice task planning and organizing!).
- “Put the (letter) in the box”. If they don’t do it after a short pause, point to the letter and box and repeat direction.
- “Squeeze paint in bowl/plate”. “Ok. Now put marble in paint. Roll around”. You may talk about how the ball is “covered” in paint or how the paint feels on their hands. Have wipes ready- many don’t love this feeling! You can always use tongs or scoop up with a spoon if they refuse to touch.
- “Put marble in box” If they don’t do it after a short pause, point to the marble and box and repeat direction.
- “Roll it back/forth, up/down, left/right” (choose any of these combinations but be consistent with the vocabulary).
- Repeat these directions with each new paint color you use.
- Set aside to dry. When it’s done talk about where you can hang it on the bedroom wall (or in a frame) and what you need to hang art on walls.


DIY Night Light: Easy Version
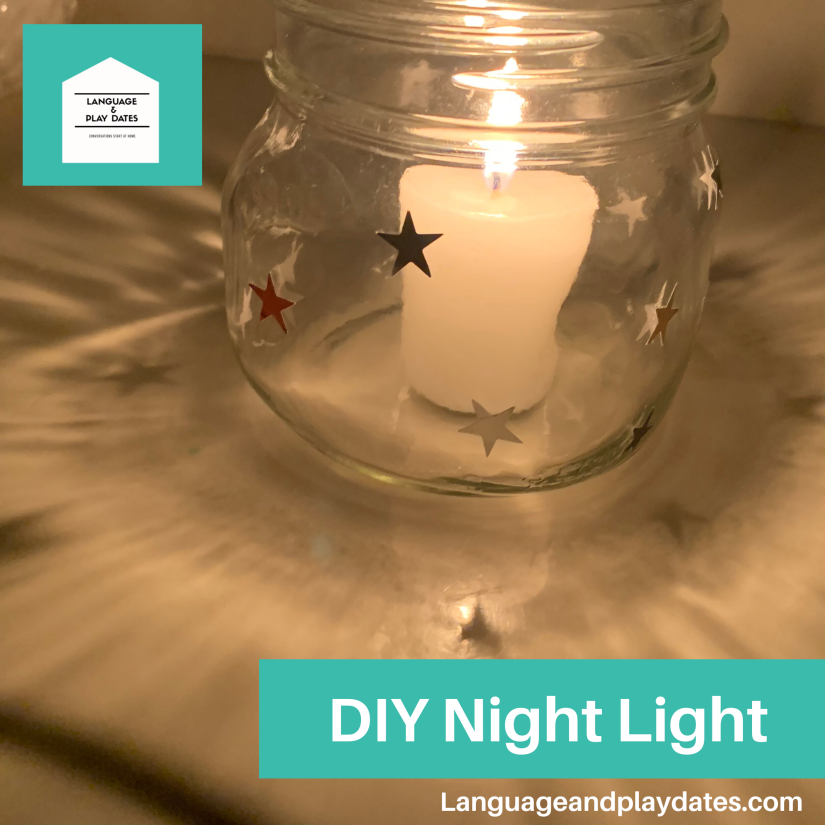

Materials Needed:
- Mason Jar
- Shape Stickers
- Batter Operated Tea Light
Directions:
- Gather all materials. Let your child help you with this. Name the areas of your house you find each one in “Get the stickers from the art drawer. Now let’s get the mason jar out of the pantry/cabinet”. Set all up on the table (“put it on the table”).
- “Get the Mason Jar”. If your child has the attention span, spend a few minutes talking about how you can see through it, how it feels hard and fragile. It’s made of glass, and you put things inside of it (great for describing practice)
- Tell your child to “Get a star (or other shape)”. Once they have gotten the star say “you got a star thats (color!).
- “Put the star on” (when they put the star on narrate where they put it- oh you put that star next to a silver star.)
- Repeat 3-4 with every star/shape they put on the mason jar.
- When child is done (or out of stickers!) say ok “Stickers are on. We have a lot of stars”
- “Get tea light” If they don’t do it after a short pause, point to the tea light and repeat direction.
- “Turn on.”
- “Put tea light in the jar”.
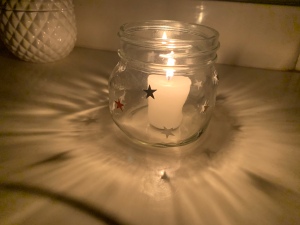
- Turn off the lights and watch the stars/shapes shine. Talk about the shadows and dark vs. light. Have your child tell you how you made the night light.


Feeling like you can tackle a more complex night light? Find visual directions for this one in the packet:


Toddler Fabric Hunt
What You Need:
- Pictures of Fabric from ONE room
Toddlers have no idea what fabric is and they don’t have a large vocabulary for adjectives yet- so this task is focused on exposing them to adjective vocabulary and NAMING the item the fabric is used for (pillows, sheets, sleep sack, chair, etc.).
Directions:
- Before Starting: Take pictures of fabrics in your child’s bedroom (or print them off from a website!). Cut out.
- Tell your child that you are going on a scavenger hunt (they may be used to this term from previous weeks). Start by saying “Let’s go to your bedroom” (great chance to see if they understand the vocabulary word for their room!). If they don’t go, lead them.
- Take the first fabric and say “look! This is floral, it has flowers on it (pointing to fabric printout). I want to find this fabric! Hmmm, where could it be? (looking around with child with you). Here it is! The sheets have flowers on them! The sheets are floral!”.
- After modeling what you want them to do, show them another print. “Look (to get attention) at this one! It is Striped (point to stripe- or whatever pattern). Hmm can you find it?”
- Give them a few minutes to look around. If they don’t understand or get lost- point to the item and say “look there! That has stripes”. Hopefully your child will go pick up the item (in this case, a pillow). “You got the pillow! It has a stripe on it. This is a (pause for them to name).”
- Repeat for each fabric. Remember- object matching can be difficult at this age so keep it simple and only to a few fabrics at a time! And don’t worry if they don’t catch on right away. Over time they will figure it out. Practice makes perfect 🙂
- Once you have found all the fabrics look at each item and practice naming the things you found. “You found a pillow. You found the sheets. You found the sleep sack, etc.”. (If they know the vocabulary already definitely add in the adjectives for practice naming!)

“Big Kid” Fabric Hunt (Pre-K and Up)
What You Need:
- Worksheet Pages from the Packet
- Crayons/Markers
Did you know that 90% of task planning happens in a different place than where the task will occur? This Fabric Hunt will help us strengthen that skill while also practice adjectives and expanding sentences!
Directions:
- Print of worksheets. Look them over with your child. Talk about each adjective given and have them describe it to you however they can.
- Then move around the house looking for the different types of fabric.
- When you find a striped (or any adjective) have them draw a picture of the item found. Then use the sentence starters on the worksheet to use the item name in a sentence along with the adjective.
- “Bonus points” if they can add to the description (e.g. tell the colors, talk about how it feels, etc.) and/or where they found it!
- Go through each item the same way until you find all 6!

DIY Dream Catcher

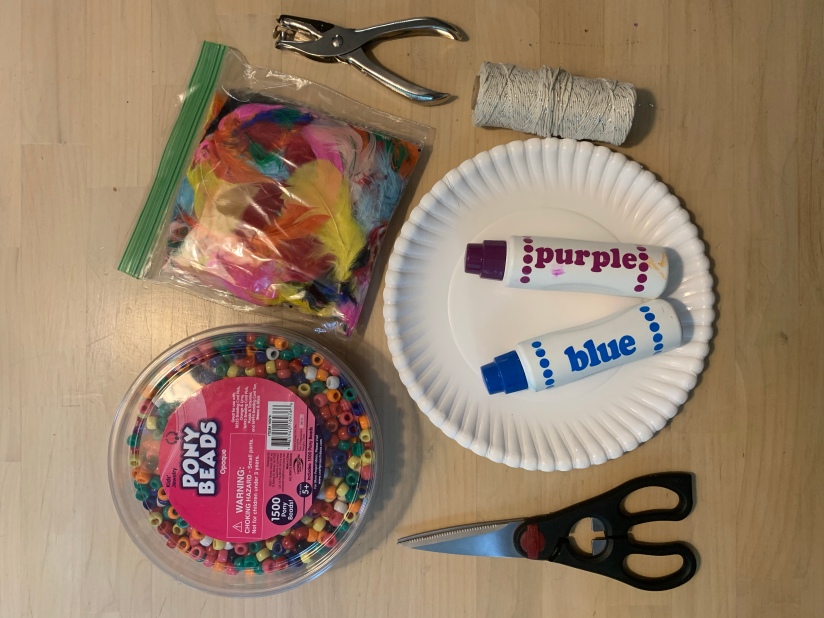
Materials Needed:
- Paper Plate
- String
- Feathers
- Beads
- Scissors
- Dot Markers (or anything else you want to decorate with!)
- Visual Directions
Directions:
- Gather all materials. Let your child help you with this. Name the areas of your house you find each one in “Get the paint from the art drawer. Now let’s get the plate out of the pantry”. Set all up on the (protected) table (“put it on the table”). Go ahead and choose the colors of paint to be used- make sure they are requesting!
- Read the visual directions all the way through out loud, pointing to each picture. If your child is using sentences point to each picture afterwards and have them tell you again what is going to happen (to practice task planning and organizing!).
- “Get the Plate and Scissors.” If they don’t do it after a short pause, point to the paper plate and scissors and repeat direction.
- Cut a hole in the center- this may be done by the parent or with supervision by a child.
- “Get the Dot Markers. Let’s design the dream catcher!” (decorate the plate then let dry.)
- “Get the Hole Puncher.” If they don’t do it after a short pause, point to the hole puncher and repeat direction.
- “Punch holes around the plate on the inside (model the first hole)”. With supervision, let them try this. TIP: For younger children- do fewer holes :).
- Add 3 holes on the bottom (for the feathers to hang) and 1 hole on top (to add string for hanging on wall).
- “Get the String.” If they don’t do it after a short pause, point to the string and repeat direction.
- Roll out as much string as will be needed. Tie a knot on the back of the plate using the string. Parents- model what you are doing using the prepositions “through (the hole)” and “across (the plate)”.
- “Put the string through the hold. Now go across.” Do this until all holes have been filled. Tie a knot on the back when completed. Cut away any extra string.
- Get 3 strings.
- “Get the Beads and Feathers.”If they don’t do it after a short pause, point to the string and repeat direction. “You got the beads and feathers.”
- “Tie a feather onto each string.”
- “Let’s add beads”. Thread beads “onto” the string “above the feather”.
- Tie the feather strings onto the bottom of the plate. “Add to bottom of plate. Put the string through the hole. (repeat with each string)”.
- Tie a small string on top to hang on the wall!
I hope you have enjoyed our week of all things bedroom and your child has expanded their vocabulary! If you want even more “worksheets” for your child to use during this week you can find my bedroom unit with additional activities, crafts, and worksheets HERE. Check out Bedroom Week Story Highlights on Instagram for more on each of these activities.

Our Favorite Books Related to the Bedroom:


Follow us on Instagram at @Languageandplaydates this week to see how we use these activities to increase language no matter your child’s age!
This is part of a 12 week series. Check out some of the previous weeks:
Want ALL of the packets with the visual directions? Grab the bundle HERE for 20% off!

